Benjamin Franklin

Gainesville, FL

  • Home
  • Services
    • Drain Clearing
      Drain Unclogging
      Drain Cleaning
      Emergency Plumbing
      Faucet Installation
      Faucet Repair
      Garbage Disposals
      Garbage Disposal Repair
      House Repiping
    • Hydro-Jetting
      Leak Detection
      Plumbing Repairs
      Sewer Line Repair
      Sewer Line Replacement
      Shower Installation
      Shower Repair
      Sump Pumps
      Tankless Water Heaters
    • Toilet Installation
      Toilet Repair
      Water Filtration
      Water Heater Installation
      Water Heater Repair
      Water Line Repair
      Water Line Replacement
      Water Softeners
      Well Pump Repair
  • Service Areas
  • Specials
  • About
  • (352) 781-0536
  • Book Now

9 Reasons Your Sump Pump Is So Loud

plumber fixing sump pump thats making loud noisesYour sump pump plays a crucial role in keeping your basement protected against flooding. And while some noise is quite normal, it shouldn’t sound like a construction site as it cycles on and off.

Any rattling, grinding, or excessive humming should prompt you to book professional service right away.

Quick Answer: Why Is My Sump Pump So Loud?

Loud sump pumps usually have mechanical issues or loose components that stem from installation mistakes or a lack of maintenance. Banging and humming noises frequently trace back to vibrating pipes, worn motors, or faulty check valves. Identifying the root cause of the noise is crucial to restoring quiet operation and preventing costly damage.

  • Loose or vibrating discharge pipes
  • Check valve clatter
  • Impeller damage or debris
  • Float switch problems
  • Motor wear
  • Pump running dry or slurping air
  • Incorrect pump size or installation
  • Continuous operation / short cycling
  • Old or low-quality pump design

9 Reasons Your Sump Pump Is So Loud (and the Fixes)

Have no fear if you hear your sump pump being louder than normal—the majority of problems have simple solutions.

1. Loose or Vibrating Discharge Pipes

Unfastened pipes will pound on adjacent surfaces as water flows through.

Fix: Add brackets, insulation, or rubber grommets to hold pipes steady.

2. Check Valve Clatter

When the water flows backwards, a defective or improperly installed check valve may emit a loud clunk or banging sound.

Fix: Install a quiet check valve or reposition the existing one.

3. Impeller Damage or Debris

If the impeller is twisted or stuck, the pump will make grinding or gurgling sounds.

Fix: Clean the impeller regularly; replace it if it shows wear.

4. Float Switch Problems

If the float switch is stuck or misplaced, it will make a buzzing or clicking noise all the time.

Fix: Adjust the float’s position or replace the switch entirely.

5. Motor Wear and Tear

A motor that is old or broken might make noises like buzzing, humming, or even shrieking.

Fix: Have the motor serviced, or replace the whole pump—it’s often cheaper long term.

6. Pump Running Dry or Slurping Air

If the water level drops too low, the pump will slurp and gurgle as it draws in air.

Fix: Adjust the shut-off height and ensure the pit has enough water.

7. Incorrect Pump Size or Installation

Undersized pumps work too hard and become too hot, while pumps that are too big operate too aggressively.

Fix: Have a professional size your pump properly for your home.

8. Continuous Operation or Short Cycling

If you hear a constant hum or boom, it might be because of a broken valve or a high water table.

Fix: Inspect your drainage system, replace the valve, or consider a backup pump.

9. Old or Low-Quality Pump

Older or less expensive pedestal models are known to be very inefficient and loud.

Fix: Upgrade to a submersible, high-quality model designed for quiet operation.

How to Prevent Loud Sump Pump Noise

overhead view looking inside homeowner's sump pump pitTaking action now with proactive care will have your sump pump ready to operate efficiently and quietly during the next heavy rain or storm.

  • Tighten and stabilize all piping connections
  • Book a professional inspection once a year
  • Keep the sump pit and impeller free of buildup
  • Consider replacing with a quieter, sealed-motor unit

When to Call a Professional

Some noise issues with sump pumps are easily fixable with DIY approaches. Others, however, will require professional assistance. Here’s when to call in a pro:

  • Noisy operation continues even after DIY repairs
  • Increased chance of basement flooding
  • Frequent blockages that keep coming back
  • Problems with wiring or power supply

Benefits of professional inspection and replacement include:

  • Reliable diagnosis with each service visit
  • Correct pump size matched to your home’s needs
  • Stronger defense against basement flooding
  • Safe handling of electrical and plumbing connections
  • Longer-lasting sump pump performance
  • Smoother, quieter, and more efficient operation

FAQs About Loud Sump Pumps

Are sump pumps supposed to be noisy?

Sump pumps typically produce a low humming sound as they move water out of the pit. You might also notice a thump when it reverses through the check valve. Any screeching, grinding, or rattling noises are major red flags to get professional help.

What sump pump is the quietest?

The quietest sump pumps are the high-quality submersible styles with sealed motors. These models have quiet check valves that close smoothly to prevent loud banging or clattering noises.

Should I repair or replace a noisy sump pump?

It’s only worth repairing a loud sump pump if it’s a newer model that doesn’t have major problems. Older models that constantly break down will be more cost-effective to replace.

How long should a sump pump last?

Sump pumps have an average lifespan of 7 to 10 years, with proper care. Letting us handle the installation is a great way to know the job is done right.

Key Takeaways

  • Unusual sump pump noises often mean loose pipes, valve issues, or worn parts.
  • Quick fixes like pipe insulation or replacing a check valve can solve many problems.
  • If noise continues, it’s a warning sign—it may be time for professional inspection or replacement.

Book Expert Sump Pump Repair in Gainesville Today

Benjamin Franklin Plumbing LogoIf you’ve never used a sump pump before, just know that low humming is very normal. The clunk or thud you hear when it reverses through the check valve is nothing more than the water flow stopping.

You can probably reposition the valve to reduce the noise. But any excessive noises that don’t go away should kick you into gear to book service.

Don’t ignore loud sump pump noises. Call Benjamin Franklin Plumbing today for expert sump pump inspection and repair. We serve all of Gainesville, FL and the nearby areas. People keep turning to us for help because we’re the punctual plumbers who always show up on time.

Filed Under: Blog

11 Common Sump Pump Problems

What Are the Most Common Sump Pump Problems?

overhead view looking inside homeowner's sump pump pit to help fix problems with itA sump pump works quietly behind the scenes to keep water out of your basement, but even this hardworking system can run into problems, like a broken float switch, a clogged discharge line, or worn-out motor bearings. Here’s a list of 11 common sump pump problems.

  • Power failure
  • Overwhelmed pump
  • Wrong size pump
  • Improper installation
  • Clogged sump pit
  • Clogged or frozen discharge line
  • Stuck or broken float switch
  • Pump runs continuously
  • Loud noises/vibrations
  • Pump burnout
  • No water in the sump pit

11 Most Common Sump Pump Problems and Solutions

Knowing what’s wrong with your sump pump matters. But identifying and fixing the problem is even more important.

1. Power Failure

Since sump pumps rely on electricity to function, a storm could knock your pump offline. To prevent this from happening, install a generator or a battery backup system and test it at least once a year.

2. Overwhelmed Sump Pump

Your sump pump may not be able to handle heavy rainfall or it may simply be too small. Upgrade to a higher-capacity unit that’s powerful enough to handle the volume of water coming into your basement.

3. Wrong-Size Pump Installed

An undersized sump pump can burn out from being overworked. On the other hand, an oversized unit can short cycle. Talk to a professional plumber to get the right-sized sump pump for your home.

4. Improper Installation

If your sump pump was installed in the wrong location or the discharge pipe is not sloped downward properly, the pump may not be able to protect your home against high water levels. T

here may also be a missing check valve. To ensure your system works effectively, have a licensed plumber install your sump pump.

5. Clogged Sump Pit

Dirt, gravel, or debris can block your intake screen, preventing water from reaching the sump pit. To prevent clogs, clean your pit regularly and install an air-tight sump pit lid.

6. Clogged or Frozen Discharge Line

Clogs in your discharge line can stop water flow and force it back into your home. To fix the problem, clear out any debris and melt the ice with hot water. Then insulate the discharge line and install IceGuard to prevent future freezing.

7. Float Switch Issues

The float switch tells the sump pump when to turn on. If it’s stuck, misaligned, or broken, it can’t do its job. You can either adjust the switch by removing any debris around it or replace it.

8. Pump Running Non-Stop

Your sump pump may run non-stop if you’re experiencing a high water table or heavy rainfall, you have a faulty switch that’s stuck in the “on” position, or there’s a broken check valve that’s preventing water from flowing back into the sump pit. You can resolve the problem by replacing any faulty parts and adding a secondary pump, if needed.

9. Loud Noises or Vibrations

If you’re hearing loud noises or noticing vibrations, you probably have worn-out motor bearings or debris blocking your impeller. Firstly, clean your impeller. If the problem persists, schedule repair or replacement services.

10. Pump Burnout

Pump burnout happens when your sump pump runs too often or is continuously forced to work hard by pumping dirty water. To resolve the issue, keep the pit clean. If the issue continues, your sump pump may be too small. Have licensed plumbers install the correct capacity pump.

11. No Water in Sump Pit

If no water is reaching your sump pit, you probably have a clogged or damaged drainage system. Alternatively, it may not be connected properly. Call a professional to inspect and repair your drain tile system.

How to Prevent Sump Pump Problems

Diego, a professional plumber from Benjamin Franklin Plumbing, standing in a well-lit kitchen holding a tablet, ready to assist with plumbing solutions in Gainesville.If you want a reliable and efficient sump pump, regular inspections and tests are a must. Here are a few steps you can take to prevent problems before they start.

Routine Maintenance Tips

  • Test your pump monthly with a bucket of water. Make sure the float switch turns on and discharges the water properly.
  • Clear any debris from the pit and discharge line to prevent future clogs.
  • Make sure the float switch and check valve are functioning properly and are not blocked by debris.

Long-Term Protection

  • Install a backup pump or a secondary system for additional protection.
  • Schedule an annual inspection with licensed plumbers to ensure your sump pump is working effectively.
  • Install a battery-powered or water-powered backup in case there’s a power outage.

When to Call a Professional

If you have constant repair issues or your sump pump is cycling too often, call a professional plumber. Flooding, electrical issues, or sewage smells are other red flags that something is wrong with your pump.

Scheduling a service with a licensed plumber comes with important benefits. Plumbers can pinpoint issues with a camera inspection, they can redesign or reinstall your system if it’s working ineffectively, and they can offer tips and permanent solutions to recurring problems.

FAQs About Sump Pump Problems

Homeowners often have questions about their sump pumps. Here are common questions we hear.

How do I know if my sump pump is failing?

If your sump pump doesn’t activate when you pour water into it, it’s a clear sign it’s failing. Other signs include strange noises, visible rust, and running constantly without actually pumping any water.

How long should a sump pump last?

If you’re consistent with maintenance services, your sump pump should last 7-10 years with average use. However, if your sump pump runs frequently and is not well maintained, expect to see a shorter lifespan.

Should a sump pump run all the time?

No, a sump pump should not run all the time. It should only run when there’s enough water to trigger its float switch. It should turn off when the water level is low again.

Can I fix a sump pump myself?

While you can perform minor fixes yourself, like clearing out clogs and replacing a check valve, you should leave more complex issues to licensed plumbers.

Key Takeaways

  • Most sump pump problems stem from power loss, clogs, or improper installation.
  • Regularly testing and cleaning your sump pump can prevent 90% of issues.
  • Installing a backup power system and scheduling regular inspections will result in peace of mind.

What a Licensed Plumber Can Do

Benjamin Franklin Plumbing LogoIgnoring sump pump issues, even minor ones, can lead to widespread flooding in your basement, mold or mildew growth, and significant property damage. If your sump pump is showing signs of failure, contact Benjamin Franklin Plumbing today for fast inspection and repair services.

Our punctual plumbers will arrive with the right tools and replacement parts to get your sump pump working again. We serve Gainesville, FL and the surrounding areas.

Filed Under: Blog

How Long Do Sewer Lines Last?

cast iron pipe that lasted long in homeowners plumbing system but eventually brokeSewer lines are more important than most homeowners think. For reference, sewer lines are the underground pipes that move sewage and wastewater away from a home’s plumbing fixtures before sending it to a private septic tank or a municipal sewer system.

Unfortunately, sewer problems are relatively common. Available data shows that around 850 sewer line breaks occur in the U.S. and across North America daily.

Signs of a Sewer Line Problem

A broken or damaged sewer line can present in many ways. Some of the most common include foul or unpleasant smells and slow drainage in sinks, tubs, or toilets. The following are also common signs of a broken or damaged sewer line:

  • Unusual sounds – Severe blockages caused by degradation or breaks in a sewer line can trigger gurgling sounds, which typically emanate from toilets when air is pushed back up the line.
  • Flooding and foul yard smells – According to most plumbers in Florida, broken, degraded, or otherwise damaged sewer line pipes can cause water to pool and eventually seep through the grass in a home’s yard. Both of these can trigger a foul odor of sewage gas. Sinkholes, along with foundation cracks and settlement, are also telltale signs of sewer line damage on the outside of a home.
  • Water damage – While the majority of the sewer line on a home’s property is underground, parts of it are in and beneath the house. As a result, when sewer lines break or degrade, signs of water damage can appear in the form of mold on floors and walls. Peeling paint, musty odors, warped or sagging materials, and visible stains are also common signs of water damage associated with broken or degraded sewer lines.

Homeowners vs. Municipalities: Who Should Be Responsible for Sewer Line Repairs?

If a home’s sewer line connects to a private septic tank, the homeowner is responsible for making necessary repairs when something goes wrong. Sewer lines connected to a municipal sewer line are not as straightforward.

Generally speaking, homeowners are responsible for repairing any portion of a broken or damaged sewer line pipe that runs from their house to the public sewer main. Municipalities, meanwhile, are responsible for any portion of the pipe that carries sewage and wastewater away from multiple properties.

How Long Do Sewer Lines Typically Last?

Aging is at the heart of most sewer line problems. Depending on pipe materials, these critical plumbing lines typically last 50 to 100 years. Modern-day sewer lines use schedule 40 polyvinyl chloride (PVC) or acrylonitrile butadiene styrene (ABS) piping.

In older homes, cast iron, Orangeburg, or clay pipes are more common. Modern-day piping materials offer several benefits over older piping materials. And those benefits contribute to their longevity.

Schedule 40 PVC piping, for example, is strong enough to withstand corrosion and root intrusion. ABS piping is strong, durable, and can withstand extreme temperatures.

Meanwhile, older piping materials are more prone to corrosion and are not nearly as structurally sound as modern piping materials. The following is a more detailed breakdown of life expectancy for modern and older piping materials:

  • ABS – 75 to 100 years
  • Cast iron – 50 to 75 years
  • Clay – 50 to 60 years
  • Orangeburg – 25 to 50 years
  • PVC – 75 to 100 years or more

What Causes Sewer Lines To Fail Prematurely?

sewer line break caused by tree root intrusionWhile sewer lines can last 50 to 100 years or more, the following can drastically shorten their lifespan:

  • Extremely high water pressure
  • Extreme temperatures
  • Frequent clogs
  • Improper installation
  • Lack of maintenance
  • Shifting soil
  • Tree root invasion

Should You Repair or Replace Damaged Sewer Lines?

Several factors dictate whether it is better to replace or repair damaged sewer lines. Some of these include the nature and severity of the damage, the age and material of the existing pipelines, and the likelihood of future plumbing problems.

Minor and localized damage to sewer lines is usually repairable. However, extensive damage, recurring issues, or aging piping infrastructure often requires a complete sewer line replacement. The options for repairing or replacing damaged sewer lines include the following:

  • Traditional sewer line repair – Also known as open trench repair, traditional sewer line repair is ideal when access to sewer lines is limited or when replacing an entire sewer line is necessary. It involves using heavy-duty machinery to dig a trench to access buried sewer lines and then repairing or replacing broken or damaged pipes.
  • Trenchless sewer line repair – Trenchless sewer repair involves a plumbing professional using tiny access points around the beginning or end of a pipe run to remove buildup or to repair or replace damaged sewer lines. Compared to traditional sewer line repairs, trenchless repairs cause little to no damage to landscaping, sidewalks, or driveways.

How To Extend the Life of Existing Sewer Lines

All sewer lines will eventually fail, but there are ways to extend their lifespan. Routine maintenance, which involves a plumber performing a camera inspection, removing buildup in the lines, and relining pipes if needed, is one way. It is also one of the most important.

Maintaining clean drains can also extend the lifespan of sewer lines. If you don’t already have them, installing drain screens can help keep grease and other food debris out of not only kitchen drains but also out of sewer lines.

Protecting sewer lines from tree root invasion can also extend their lifespan. Installing root barriers is an effective way to accomplish that.

Hire a Florida Plumbing Professional Today

Benjamin Franklin Plumbing LogoTo summarize, sewer lines serve as a crucial component of a home’s plumbing system. Unfortunately, they are susceptible to damage from tree root invasion, age, extreme temperatures, and a host of other things.

To learn more or to schedule a service call, consider speaking with a Gainesville Benjamin Franklin Plumbing associate today.

Filed Under: Blog

7 Signs You Need Sewer Line Replacement

plumbers doing video sewer line inspection to determine if homeowner needs sewer line replacementWhile it lurks in hiding most of the time, your sewer line plays a vital role in your home’s plumbing system. After water is used, sewer lines are responsible for removing wastewater from your home. If the pipe becomes damaged by corrosion, roots, age-related wear, or other kinds of damage, you’ll need to get it replaced.

Key Signs You May Need a Sewer Line Replacement

As soon as you notice slow drains in multiple locations, wet spots in your lawn, odd sewage odors, or frequent backups, you need to reach out for professional help right away.

1. Multiple Slow or Clogged Drains

Pay attention to clogged drains. If this issue happens in your showers, toilets, sinks, and tubs at the same time, it indicates a main line problem instead of an issue with an individual fixture.

2. Sewage Backups Inside the Home

If raw sewage backs up from your shower, floor drains, or tub, it is a sign of a major sewer line issue. You need to call Benjamin Franklin Plumbing right away for professional help.

3. Sewer Gas Odors Indoors or Outdoors

One common indicator of sewer line problems is the smell of sewage.

4. Lush or Soggy Patches in Your Lawn

When sewage leaks into your lawn, it ends up fertilizing the grass. This can lead to soft, wet ground and lush grass.

5. Inexplicable Pest Activity

Sewage leaks attract rodents and insects, so a sudden pest infestation means you may have a problem.

6. Mold or Mildew Growth Indoors

The added moisture from a sewer leak can result in water damage, mold, and mildew.

7. Cracks in Your Home’s Foundation

Thanks to the increased water and sewage, your property can develop soil erosion. This can destabilize your home and lead to leaking sewage.

Common Causes of Sewer Line Failure

sewer line break caused by tree root intrusionWhile each situation is different, there are a few possible reasons why sewer issues occur.

Root Intrusion

Over time, tree roots can penetrate your sewer pipes. This causes small cracks to start leaking water. Often, this happens to older cast-iron or clay pipes.

The Pipe’s Material or Age

You can generally expect different types of pipes to achieve the following lifespans before they begin running into problems.

  • Clay: 50 to 60 years
  • Cast Iron: 75 to 100 years
  • Orangeburg: 30 to 50 years
  • PVC: 100 years or more

Corrosion and Natural Wear

Over the decades, rust and mineral buildup can develop inside the walls of your pipes. Besides reducing the flow rate, it can also weaken the pipe’s walls and lead to leaks.

Natural Disasters and Settling Soil

If a flood, earthquake, or construction damage causes the soil to move, it can damage your pipes.

Repair Vs. Replacement: How To Decide

Once you realize that you have an issue with your sewage system, the first step is determining whether you want to repair or replace it.

When To Perform Repairs

Repairs make more sense for localized damage and minor cracks. If the general pipe structure is still sound, you can often repair the problem.

When To Perform a Replacement

A replacement makes more sense if you’re dealing with repeated pipe failures and widespread damage. Additionally, you should replace the pipes once they reach the end of their typical lifespan.

Sewer Line Replacement Methods

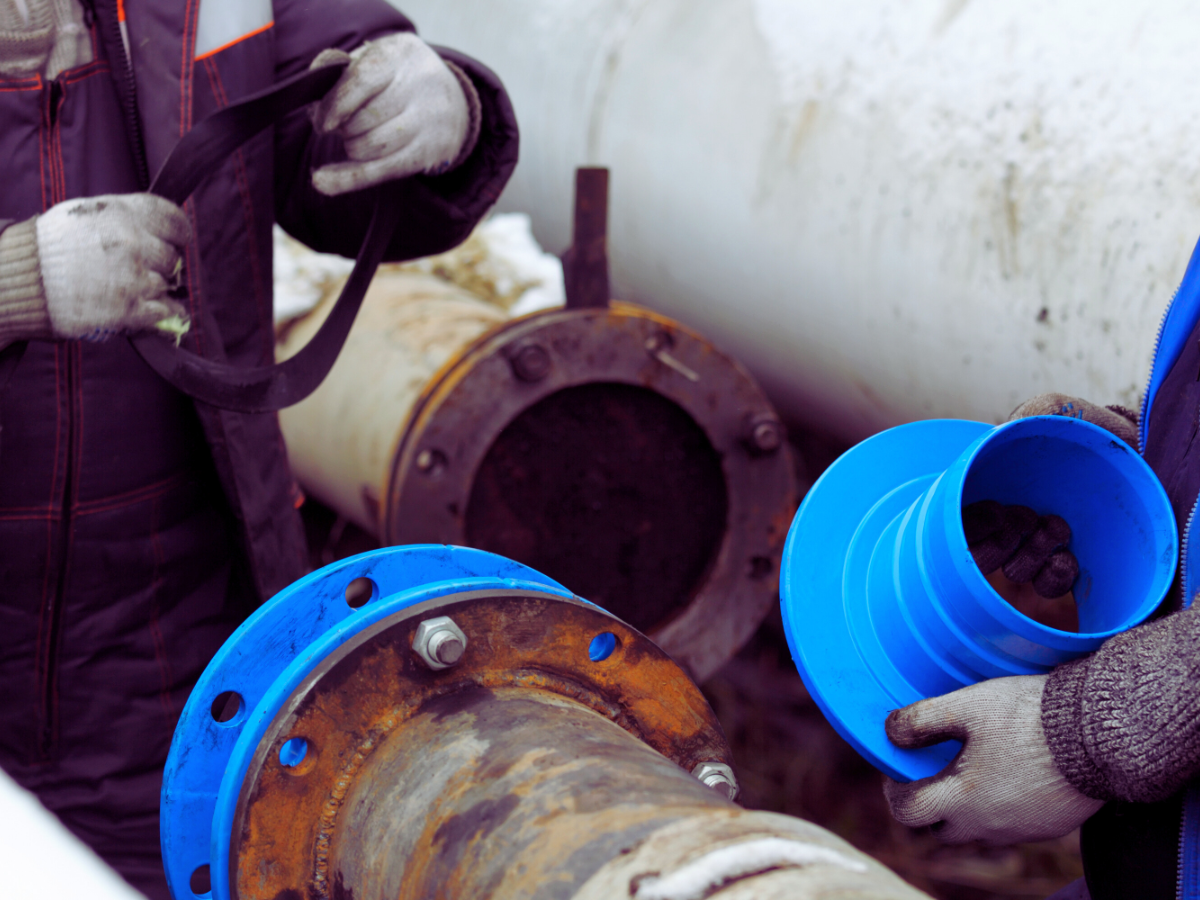
Once you decide to perform a replacement, there are a few standard methods that you can use. One of our plumbers will review the best options for your situation before we begin working on your project.

Traditional Excavation

A traditional excavation offers full access to the pipes, making the complete removal of sewage pipes easier. However, this approach can take longer and lead to landscaping damage.

Trenchless Sewer Replacement

Trenchless sewer replacements involve the least amount of digging, so you can enjoy a faster turnaround time. This technique is best for instances when you’re dealing with a burst pipe or a localized issue.

Steps To Take if You Suspect a Sewer Line Problem

If you think that you may have a sewer line issue, you should immediately take the following steps.

  • Stop using any plumbing fixtures in your home to prevent sewage from backing up.
  • Reach out to our licensed plumbers for a professional camera inspection.
  • Ask for a cost estimate for a repair or replacement.
  • Carefully compare both prices to determine which one makes the most sense for your home.

How To Prevent Future Sewer Line Issues

Once you’ve solved your existing sewer line issue, the next step is figuring out how to avoid it in the future.

  • Don’t plant large trees next to your sewer lines.
  • Schedule a routine inspection every two to three years.
  • Make sure you dispose of fats, grease, bits of food, and non-flushable items correctly.

FAQs About Sewer Line Replacement

Over time, we’ve heard a few common questions about sewer line replacements.

How long does a sewer line last?

Sewer lines can last for 30 to 100 years. It all depends on the material.

How much does a sewer line replacement cost?

A sewer line replacement can vary significantly based on all of the work that needs to be done. Often, this type of project costs between $3,000 and $6,000.

Can I replace a sewer line myself?

To ensure the best results, it’s generally better to have your sewer line replaced by plumbing experts.

How long does trenchless replacement take?

A trenchless replacement can take anywhere from one to two days to wrap up.

Breathe Easy With the Help of Benjamin Franklin

Benjamin Franklin Plumbing LogoIf the damage is impossible to repair, the sewer line needs to be completely replaced. You can figure out if you have a problem by looking for soggy spots, recurring clogs, or slow drains. By getting a professional inspection early, you can save money and protect your property.

For sewer line replacements in Gainesville or the surrounding areas, give the punctual plumbers at Benjamin Franklin Plumbing a call.

Filed Under: Blog

What Common Items Should Never Go Down Drains?

What Common Items Should Never Go Down Drains?

What Common Items Should Never Go Down Drains?

Putting stuff down the drain often feels like the easiest and fastest solution. Be it in the kitchen, bathroom, basement, or garage, lots of things go down the drain. The short-term convenience could lead to major drain clogs, however. It is important to know which items can go down the drain and which ones should never.

1. Oils, Greases, and Fats

Washing oils, greases, and fats down the drain seems simple enough. Even if they’ve congealed a bit, a little soap and hot water will usually get them back to liquid form. The problem is that these items seldom stay that way. Once they cool off again, oils, fats, and greases solidify.

Making the problem worse, oils, greases, and fats interact with other things that go down the drain. Toilet paper can mix with these materials, producing so-called “fatbergs,” masses that slow down and eventually clog drains. As the mass accumulates, it causes more items to gather around until there’s a total blockage.

By some estimates, almost half of all drain clogs arise from some combination of oil, grease, and fat. On the upside, avoiding the problem is relatively easy. Possible options include:

  • Wiping remaining oil from pans at the end of cooking
  • Putting leftover grease, oil, or fat in old or leftover jars
  • Using a product that congeals liquid oils for disposal in the garbage

2. Coffee Grounds

The issue with coffee grounds is that they tend to expand when they’re wet. Lots of water will go down your drains, so coffee grounds have lots of chances to pick up water. Once the grounds expand, they can slow or stop draining. The good news is that you can directly throw coffee grounds into the garbage.

3. Eggshells

Eggshells contain calcium carbonate. They are also prone to fragmenting. When those fragments go down the drain, they end up scoring the pipes. As more scoring forms, it acts as a better place for other items to attach to the pipes’ surfaces. Even if your drain has a garbage disposal, all it does is produce smaller fragments that cause finer scoring. Once more, the best solution is to pitch eggshells directly into the garbage.

4. Paper and Cotton Products

Except for toilet paper, no paper or cotton product should ever go down the drain. In recent years, this problem has gotten worse because of companies that sell what they call “flushable” wipes. Ask any plumber about flushable wipes, and you will hear horror stories about main sewer pipes being destroyed. Even if a paper product claims to be flushable, it is best to put it in the garbage.

Paper swells in water, producing an effect similar to coffee grounds. Worse, paper products often have adhesives on them that act as glue when mixed with paper, water, and other items in your drain. For example, people often think it’s okay to peel off produce stickers and wash them down the drain.

5. Starchy Foods

Pasta, rice, and other starchy foods have a tendency to end up in drains after people pour off water from cooking. A little bit is bound to sneak into the drain, but you don’t want to encourage the problem. There are stoppers with holes in them that catch debris while draining food. Use these and make sure to clean them out after every meal.

6. Feminine Hygiene Products

Products like pads and tampons are a pain to deal with. However, they contain a combination of many of the other materials that shouldn’t go down the drain, such as paper and cotton. Worse, it isn’t easy for a plumber to dislodge such products with common drain cleaning methods. Wrap them carefully for disposal in your bathroom’s garbage can.

7. Paints, Motor Oils, and Other Chemicals

The drain in a garage, basement, or workshop can be a tough one to contain. However, paints, motor oils, and other chemicals create lots of problems. They can mix with other items to encourage clogged drains. Likewise, caustic chemicals will damage pipes. Many communities have collection programs for these products, so contact your local waste authority. You can also mix latex paints with kitty litter and dispose of them in the garbage.

8. Harsh Drain Cleaners

Yes, some drain cleaners aren’t great for your home’s drains. Caustic chemicals in a drain cleaner can damage pipes, especially if your place has metal drains. They can also affect plastic fittings that prevent drains from leaking.

We strongly encourage customers to only use an enzyme-based drain cleaner if they’re going to use a product off the store shelf. Although enzyme cleaners take longer, usually a few hours, they do no damage to your home’s pipes.

Tips from Plumbers

Maintenance is your drain’s best friend. Rather than waiting for a clog to appear, the best solution is to schedule regular drain cleaning. Our company recommends annual cleaning, with more frequent cleanings in houses with high usage rates or recurring problems.

Be aware that drain clogs can happen even when you take all the appropriate steps. Our experienced plumbers can give you tips on how to keep your drains clean.

When they do occur, be sure to do the following:

  • Plunge clogs first and see what happens
  • Try baking soda and vinegar to deal with slow drains that aren’t fully clogged
  • Use an enzyme solution if you use a drain cleaner
  • Avoid chemical cleaners at all costs
  • Stop before you risk damage

Remember, our plumbers are just a phone call away. We clean drains. Let a professional deal with drain clogs if you think there’s even a slight risk of overflow and water damage. If there’s any delay, it’s YOU we pay.

Final Thoughts

Watching what your household puts down the drain can reduce the risk of clogging. Combining this approach with a regular drain cleaning schedule, your household should be able to avoid major drain clogs.

If you have questions about preventing clogs, how to clean drains, or what to do with a clog, contact Gainesville Benjamin Franklin Plumbing right away.

Filed Under: Blog

What Do Plumbers Recommend To Keep Drains Clean?

What Do Plumbers Recommend To Keep Drains Clean?

What Do Plumbers Recommend To Keep Drains Clean?

A clogged drain is a plumbing issue that many homeowners face. According to a study published by PR Newswire, a trusted global news distribution and media communication platform, an estimated 20% and 9% of homeowners have toilets and sinks that are frequently clogged, respectively. While statistical data is not available, many also experience main sewer line clogs that adversely affect drains in their homes.

Consequences of Not Clearing Clogged Drains Promptly

Ignoring or failing to promptly clear a clogged drain can have immediate and long-term consequences, ranging from unpleasant odors and health risks to potential structural damage and environmental issues, like water pollution and pest infestation.

Either ignoring or waiting too long to clear a clogged drain can also lead to higher-than-usual water bills and an increased risk of electrical hazards, such as short circuits, power surges, and even fires. While some homeowners intentionally ignore drain problems or wait too long to address them, some don’t realize that they have a drainage issue to begin with.

Common Telltale Signs of a Drain Clog

While slow drainage, water backups, and standing water are the most common signs of a drain clog, they are hardly the only ones.

The following are also signs of a clogged drain:

  • Changes in water pressure or water flow
  • Debris coming out of fixtures
  • Foul odors
  • Frequent clogs in multiple fixtures
  • Gurgling or bubbling noises
  • Overflowing sinks, bathtubs, or toilets
  • Pooling water in a home’s yard if the main line is clogged
  • Staining around drains, fixtures, or both

Where Are Drain Clogs Most Likely To Occur in a Home?

In residential homes, bathroom and kitchen drains are the two drains that become clogged the most. Foreign objects, such as children’s toys and hair accessories, are notorious for clogging toilets. In kitchens and bathrooms, sinks often become clogged due to p-trap blockages, which can occur when hair, soap scum, food particles, grease, oil, and other debris repeatedly go down the drain. Blocked p-traps can also clog shower drains.

For reference, a p-trap is the curved piece of pipe under sinks and shower drains. They hold a small amount of water to block harmful, foul-smelling sewer gases that would otherwise enter the home. Along with p-trap blockages, mineral deposits from hard water can sometimes build up in regular bathroom and kitchen pipes. That buildup, especially when combined with other debris, can lead to clogs.

Lastly, a clogged main sewer line can affect the entire plumbing system in a home. Such clogs can trigger multiple drain backups, which can cause flooding, unpleasant odors, and costly water damage. They can also cause problems outside of the home.

According to most professional plumbers, a clogged main line can cause wastewater to leak into a home’s yard, leading to the development of soggy or unusually lush patches of grass. The same applies to standing water, which can attract disease-carrying mosquitoes. Tree roots invading a main sewer line are the primary cause of such clogging. Other contributors include grease and debris buildup, old or damaged pipes, and poor or improper plumbing connections.

What Do Plumbers Recommend To Keep Drains Clean?

Clean drains are less likely to cause plumbing problems. That’s pretty much the consensus among professional plumbers in Gainesville, FL. Most of these same plumbers recommend the following to help keep drains free from harmful clogs:

Salt and White Vinegar

Not all clogs require the expertise of a professional plumber. Sometimes, DIY drain cleaning is enough to break up debris and unclog bathroom and kitchen drains. However, it is best to avoid using chemical drain cleaners as they can corrode and weaken pipes, both of which can lead to complete pipe failure. Table salt and white vinegar can be just as effective in removing some clogs and a whole lot safer.

This DIY drain cleaning solution entails pouring one tablespoon of salt and a 1/4 cup of plain white vinegar into your kitchen or bathroom drain opening. Allow the solution to sit for at least one hour before running hot water down the drain to break up and flush away sediment, soap scum, hair, and other debris.

Remove Grease Clogs

Grease clogs can do a number on kitchen drains. Fortunately, clearing such clogs, in most cases, is a DIY affair. To clear out clogged grease from a kitchen sink, you will need liquid dish detergent and steaming hot water. Pour around a tablespoon of dish liquid directly into the drain, and pour in a little bit of the steaming hot water at a time. The combination of hot water and dish liquid does a great job of softening and dissolving accumulated grease.

Run Cold Water While Running Your Kitchen Disposal

If steaming hot water and liquid dish detergent do not break up and remove grease clogs from your kitchen drain, running cold water down the drain while simultaneously running your garbage disposal might help. Running cold water keeps grease clogs in a solid state, which makes it easier for the garbage disposal to break them up.

Periodically Pour Hot Water Down Your Drain

Periodically pouring hot water down your kitchen and bathroom drains is a great way to prevent clogs from happening in the first place. For kitchen drains, this simple DIY solution melts and flushes away light grease deposits that would otherwise turn into hard-to-remove clogs. For bathroom sink drain pipes, it keeps excess soap scum and gunk from accumulating and clogging up sink and shower drains.

Annual Professional Drain Cleaning

Yearly professional drain cleaning by a licensed plumber can go a long way to keeping drains in your home clog-free. Plumbers use camera scopes to detect clogs and to assess the overall health of your pipes. Sometimes hard water can also can wreck havoc on your plumbing and damage your pipes. To remove clogs or to perform general cleaning, they use drain snakes, hydro-jetting, and other equipment. Professional cleaning and inspections can go a long way toward preventing severe clogs and extending the life of a home’s plumbing system.

In summary, clogged drains can quickly become a plumbing nightmare if not promptly addressed. Fortunately, there are DIY and professional drain cleaning solutions that can break up debris and keep drains clog-free. To learn more or to schedule a service call, consider speaking with a Gainesville Benjamin Franklin Plumbing associate today.

Filed Under: Blog

9 Signs Your Well Pump Is Going Bad

While having a well comes with many benefits that keep you in control of your own water supply, the downside is that the buck stops with you when it comes to keeping your well pump working.

Your home’s well pump draws water up from your well to provide safe, clean water. Discovering an issue with your pump early can be safer and less expensive compared to letting symptoms linger.

Don’t let your well go dry without warning! Below, we cover signs your well pump is on its last leg.

Common Signs Your Well Pump Is Going Bad

signs your well pump is going badYour well pump may be in trouble if you’re noticing the following:

  • No water coming from your faucets
  • Changes in water pressure
  • Air spitting from your faucets
  • Constantly running pump
  • Dirty water coming from your faucets
  • Strange sounds
  • Tripping circuit breaker
  • Spikes in recent electric bills
  • Your pump is older than 15 years

Understanding the Basics

The main components of a well pump system are the pump, pressure switch, and pressure tank. If your home has a submersible pump, a pump located at the bottom of your well is pushing water up into your home. If your home has a jet pump, jets are suctioning water into your home.

In general, issues with jet pumps can be easier to diagnose and fix because they’re closer to the surface. The pressure switch controls pump operation by monitoring water pressure to ensure a steady water supply that won’t force your pump to overwork. Finally, a well’s pressure tank stores water to ensure you always have a reserve.

9 Warning Signs You Need a New Well Pump

Here’s a look at the telltale signs your well pump is failing.

1. You Have No Water at All

Is nothing happening when you turn on your faucets or flush your toilet? While there could be external factors at play, there’s a pretty good chance your well pump has failed. The next step is calling a plumber to verify the problem.

2. Low or Fluctuating Water Pressure

If water is dribbling out when you turn on your faucets, this is a sign that your well pump is struggling. The most likely scenario is that your well pump’s motor is failing. Don’t continue to stress your pump’s motor by using faucets or taking showers. Call a plumber to take a look.

3. Air Spitting From Faucets

Have you noticed hissing or spitting sounds when you turn on your faucets? This is the sound of air mixing with your water. A few different things could be happening.

If the problem has been persistent for as long as you’ve owned your home, it’s possible that the well pump was actually installed too high within your well. When this happens, a pump will pull in air whenever it pulls in water. Another potential cause is a leak in your pipes that allows air in as water seeps out.

To fix the problem, start by inspecting all of the visible sections of the pipe. In addition to looking for visible damage and corrosion, check for wetness that indicates a leak. Leaks that are concealed underground can be detected using a soil-probing rod.

4. Pump Runs Constantly Without Shutting Off

Does it seem like you hear your pump running at all hours of the day and night? This is a sign that the pump is struggling to push water through.

Unfortunately, this is one of those problems that will eventually lead to your pump wearing down and failing. However, the good news is that you probably have time to fix the issue before it gets worse if you’ve just noticed a running pump recently.

A well pump that runs constantly can be caused by a number of different things. Some things to check for include a leak in the system, a malfunction within your pressure tank, a bad well pump pressure switch, and an issue with the suction line.

5. Cloudy, Dirty, or Muddy Water

Your pump could be failing if it’s suddenly pulling up dirt and sediment that is leaving your home with “dirty” water. When was the last time you changed your well pump’s filter? The pump filter is usually located on the main water line before it reaches inside your home.

After ruling out an outdated filter, consider that the pump itself may be broken. At this point, it’s wise to bring in a plumber to assess if the pump’s location or power level could be causing it too pull in “too much.” Of course, you should avoid using water from your home until the situation is resolved.

6. Strange Sounds From the Pump or Tank

If you’re hearing odd sounds from your pump or pressure tank, your well pump may be about to go. Homeowners often notice a constant clicking noise coming from the pressure tank when a pump is struggling.

Additionally, it’s common to hear the sound of your pressure tank constantly stopping and starting if it has a leak or interior burst. If you suspect that your pressure tank is the cause of the noise, bring in a plumber to fix the problem as soon as possible to prevent your well pump motor from wearing out.

7. Frequent Circuit Breaker Trips

This may not be an electrical issue. When a well pump has a worn or faulty motor, it often draws excessive currents from your home’s electrical system. This will cause your home’s breaker to trip. In most cases, having your well pump’s motor replaced will take care of the issue.

8. Your Electric Bill Is Suddenly Higher

A mysterious increase in your home’s electric bill could be caused by an overactive well pump. Faulty or failing well pumps draw more energy because they are constantly cycling in order to maintain water pressure. If your well pump is constantly running, you’ll see an increase in your electric bill.

Start by ruling out any other potential causes in your home. If you’re also noticing any of the sounds or performance issues mentioned in this list, it’s likely that your well pump is the culprit. Have a plumber inspect your pump to confirm the problem.

9. The Pump Is 15+ Years Old

Well pumps are meant to last 15 years. While it’s common for homeowners to get a few extra years when they’re taking good care of components and scheduling regular well inspections, it’s usually smarter to simply have your pump or tank replaced if it’s showing signs of wear and tear or failure after the 15-year mark.

Replacement is a complicated procedure that involves accessing several feet below the surface and dealing with complex electrical and plumbing equipment. Be sure to get the project done safely using the help of a trusted local plumbing professional specializing in well parts.

Common Causes of Well Pump Failure

well pump repair
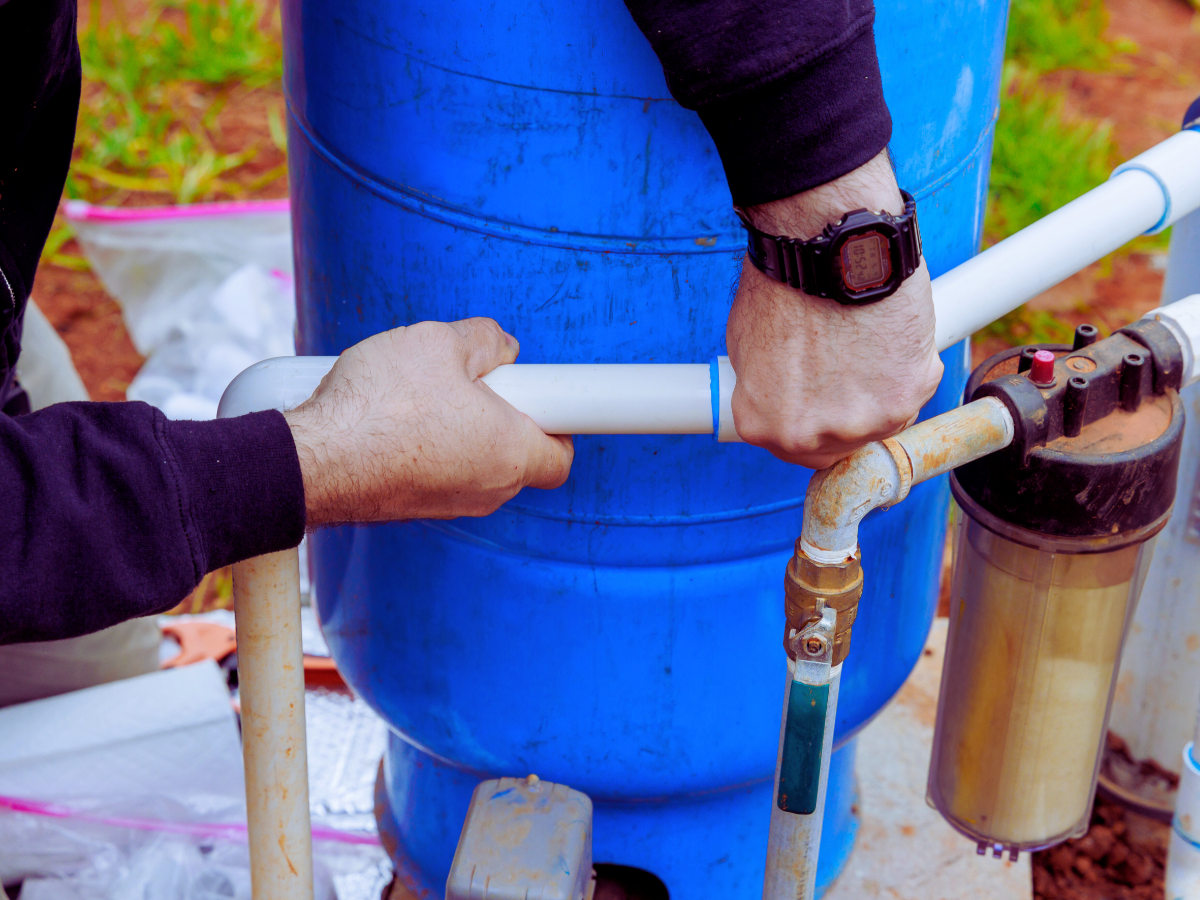
It’s not necessarily the fault of your well pump if things go wrong. Common causes of well pump failure that aren’t necessarily caused by the pump include a lower water table in your area, power surges, and sediment wear. Your pump can also wear out early due to improper pump sizing for your property and over-cycling due to tank problems.

Troubleshooting Steps Before You Replace It

Before rushing to replace your well pump, make sure you’re not overlooking an easy fix. For example, check your breaker and power supply to see if electricity has been cut off to your well pump. Additionally, your checklist should include viewing the pressure switch and gauge, inspecting the tank for waterlogging, and priming the pump if you have a jet system.

When to Repair vs. Replace

If you’ve had your well pump for more than 15 years, the more cost-effective choice is usually upgrading to a new pump instead of performing repairs. Meanwhile, tanks generally need to be replaced every eight to 10 years.

In general, any repair that costs 30% to 40% of the cost of replacement is considered unwise. It’s also important to prioritize your home’s safety. Full replacement is advised whenever there’s risk of contamination or complete failure.

Don’t Wait Until It’s Dry. Call Benjamin Franklin

Benjamin Franklin Plumbing Tampa LogoCatching a well pump issue early can often result in a cheaper fix. Call a licensed well contractor to have the issue looked at right away if you’ve noticed any of the symptoms above.

Of course, it’s also wise to keep up with routine inspections to catch problems as early as possible. Benjamin Franklin Plumbing is here to handle all of your well pump needs in Gainesville, FL and surrounding areas. We’re the punctual plumbers locals call first when they want fast, reliable service. Contact us today!

FAQ Section

What are signs of a failing well pump?

Sounds, struggling faucets, changes in water pressure, changes in water taste and smell, and lack of water are all signs your well pump may be failing.

Why is my water pressure low?

Potential causes include a clogged well screen or sediment filter, a clogged pipe, waterlogging in your pressure tank, or a failing well pump.

How long should a well pump last?

On average, modern well pumps last 15 years.

Can I fix a well pump myself?

While homeowners can generally handle issues stemming from clogged well pump filters, repairing a faulty well pump is best left to licensed professionals.

Filed Under: Blog

7 Reasons Your Well Pump Runs Nonstop

repairs for well pump that runs nonstopQuick Answers for a Running Well Pump

Is your well pump running nonstop? If so, one of these issues is likely the problem:

  • A running appliance or hidden leak
  • Bad settings or a faulty pressure switch
  • Jet pump loses its prime
  • Leaking or cracked well pipe
  • Undersized pump relative to home’s needs
  • Drought conditions or low water table
  • Impeller, seals, motor, or other pump parts are worn down

Need Help Right Now? Book a Well Pump Repair Services

How a Well Pump Works (And Why It Should Stop Running)

Your well pump is designed to turn on and off as necessary, rather than running continuously. The majority of systems utilize either jet or submersible pumps.

Jet pumps are typically used for shallow wells and are above-ground, whereas submersible pumps are usually used for deeper wells and are located inside the well. Each system is paired with a pressure switch and pressure tank that help regulate pump operations.

The cut-in point is when it turns on, and the cut-out point is when it turns off. A properly working pump cycles based on the water used in the household, but it shouldn’t stay on indefinitely.

A pump that never shuts off is a huge red flag. Continuous operation can lead to wasted energy, overheating, and ultimately, system failure. Keep reading to explore why this happens.

7 Common Reasons Your Well Pump Keeps Running

1. A Hidden Leak or Constantly Running Appliance

What it means: Leaks in fixtures or plumbing that never shut off might make a pump run nonstop, such as an outdoor faucet left active or a toilet that keeps running.

Signs to watch for: Pump motor doesn’t stop, constant sounds of running water, and surprisingly high water bills

What you can do: Shut the main valve off. If your tank’s pressure gauge keeps dropping, you likely have a leak.

Call a pro if: The leak is underground or you can’t locate it. Our punctual plumbers will find it fast.

2. Pressure Switch Failure or Improper Settings

What it means: The pressure switch tells a pump when to stop. If it’s misaligned, dirty, or set too high, it might not hit its cutoff point.

Signs to watch for: Pump runs past proper cut-out pressure, water pressure doesn’t seem right, and buzzing or clicking at the switch

What you can do: Look for corrosion or dirt on the contacts, and ensure the settings match the tank specs.

Call a pro if: You need help adjusting the switch or suspect it’s faulty. We repair pressure switches affordably and quickly.

3. Loss of Prime in a Jet Pump System

What it means: Jet pumps have to be primed with water to function correctly. If air gets into the suction line, the pump might spin but not draw water.

Signs to watch for: Pump runs without delivering anything, gurgling noises, or no water coming from taps

What you can do: Try to prime the pump manually. If that fails, professional repair might be necessary.

Call a pro if: You suspect a suction leak or are unsure how to reprime your system.

4. Cracked or Leaking Well Pipe

What it means: The underground pipe between your home and the pump might be leaking or cracked. The consequence is a pressure drop that makes the pump overwork.

Signs to watch for: Constant pump cycling, wet spots in the yard, and a sudden water pressure drop

What you can do: Not much, as this typically needs leak detection and excavation

Call a pro if: You’re suspicious about a buried line. We have the right tools to locate and resolve it quickly.

5. Pump is Too Small for Household Demand

What it means: A pump that’s undersized for your home’s water needs will run all the time trying to keep up.

Signs to watch for: Pump operations every time water is accessed, frequent pressure dips, more household occupants, irrigation, or a recent home addition

What you can do: Monitor water usage, and compare it to system specs.

Call a pro if: Your household has outgrown the system. We’ll size and install a pump that meets your needs.

6. Low Water Table or Well Supply Issues

What it means: During heavy use or drought, the water table might dip below the reach of your pump.

Signs to watch for: Constant pump noises, slower refill times, and air sputtering from your faucets

What you can do: Temporarily reduce household water use, and monitor the recovery.

Call a pro if: You’re unsure of your well capacity. We provide testing and appropriate long-term solutions.

7. Worn or Damaged Pump Components

What it means: Over time, parts like the impeller, motor, or seals can wear down, particularly in older submersible systems.

Signs to watch for: Intermittent performance, reduced water flow, and strange noises

What you can do: Listen for pump sound changes; note inconsistencies in pressure.

Call a pro if: Your system is acting erratically or is over a decade old. We’ll assess before recommending replacements or repairs.

How a Constantly Running Pump Damages Your System

  • signs your well pump is going badShorter pump lifespan because of overuse
  • Drives up your power bill significantly
  • Overheating the motor can cause total burnout
  • Elevated risk of total system failure, including damage to the pressure tank

What You Can Check Yourself (Before You Call Us)

  1. Look for running toilets or dripping faucets
  2. Inspect the pressure gauge to see if it’s fluctuating
  3. Look for visible leaks around the tank or pump
  4. Listen for clicking or buzzing at the pressure switch

Professional Well Pump Repair: What We Do

  • Test tank settings and the pressure switch
  • Inspect for electrical faults, leaks, and loss of prime
  • Diagnose flow rate performance and pump size
  • Offer clear options, such as replacement vs. repairs

Why Choose Benjamin Franklin for Well Pump Repair?

  • Benjamin Franklin Plumbing Tampa LogoLicensed, insured well pump technicians
  • Expertise in submersible and jet pumps
  • Upfront, transparent pricing
  • Punctual plumbers who respect your home and time
  • Proudly serving our local Gainesville, FL neighbors

FAQs

What happens if my well pump runs too long?

The motor can overheat, components might get worn down, energy bills are likely to rise, and the whole system could fail.

How do I reset my pressure switch?

Turn off the power first. If it has a switch lever, lift it to trigger a manual reset. Should that fail, the switch might be damaged.

Can a power outage mess up my well pump?

Yes. Following outages, pumps can develop airlocks, lose prime, or fail to restart due to electrical issues.

Is it OK for my pump to run every time I use water?

It depends. A correctly sized system that has a good pressure tank is supposed to cycle, not run every single time. If it does, you might have a faulty switch or tank.

Should I turn off my pump if it won’t shut off?

Yes. Use the breaker to turn the power off to prevent damage. Next, call a professional who can diagnose the issue.

Filed Under: Blog

12 Reasons Why Your Hot Water Isn’t Working

Water heater dial set between warm and hot
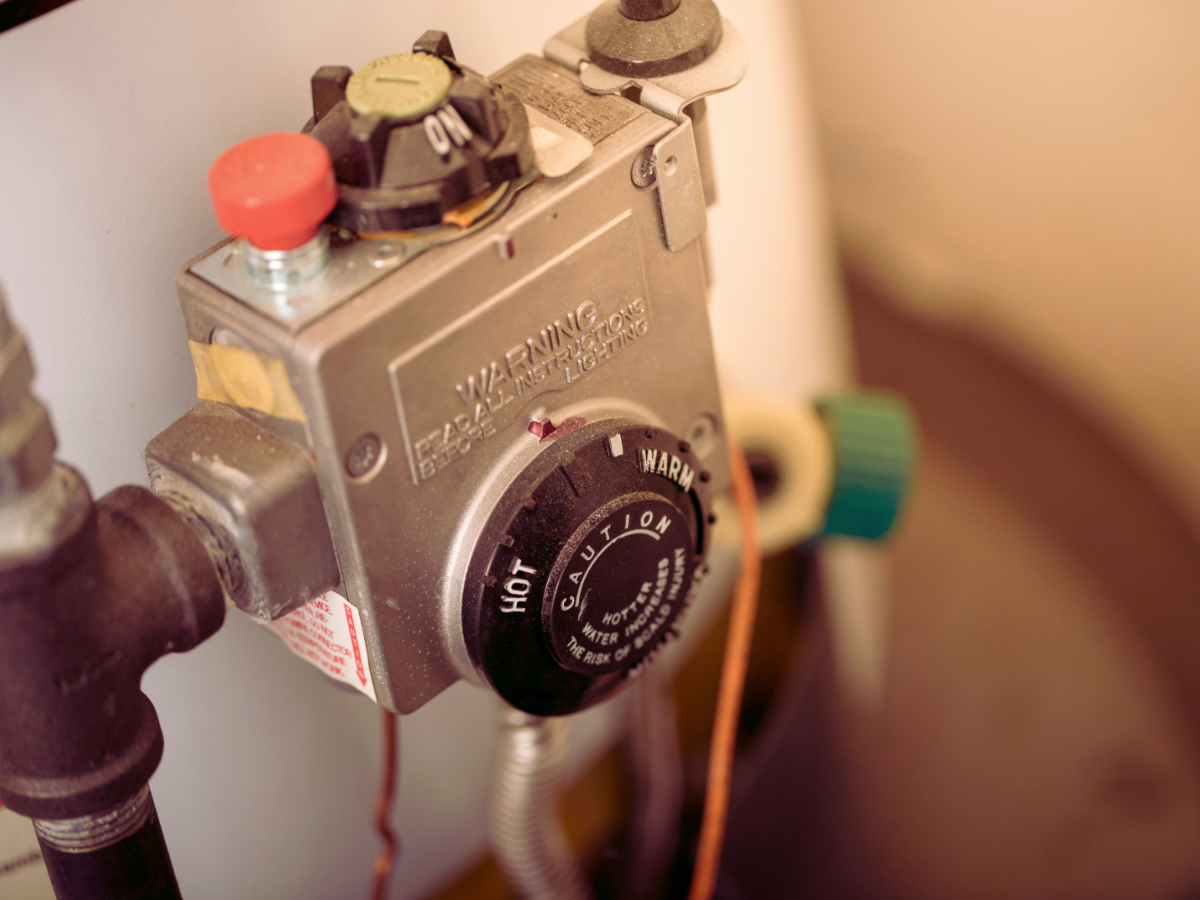
Running out of hot water is a miserable experience for homeowners with all types of water heaters. Let’s look at every major reason for a residential heater to stop producing hot water and a few solutions for DIY repairs.

Quick Diagnostic Checklist (Before You Read Further)

-Is the water heater gas or electric?

-Are any error codes showing (for digital units)?

-Are all faucets affected?

-Is there a leak around the water heater?

-Is the power or gas supply active?

12 Most Common Reasons You Have No Hot Water

Power or Fuel Supply Problems

1. Tripped Circuit Breaker (Electric): With a tripped fuse, an electric water heater won’t get any power. Check the fuse box and make sure everything’s in order.

2. Gas Supply Interruption (Gas): If there’s no gas entering the unit, it can’t use gas to heat the water. Check the line for leaks and tangles.

3. Pilot Light Is Out: If the pilot light is out, the fuel won’t heat, and you’ll have cold water. You may need to relight it.

4. Faulty Thermocouple or Igniter: If the fuel won’t ignite, it won’t heat the water. Check and replace the thermocouple and igniter if necessary.

5. Blown Fuse or Electrical Fault (Digital Models): Similar to a tripped fuse, a blown fuse or electrical issue won’t heat the water. Check the fuse box and buy a replacement fuse if needed.

Thermostat & Heating Issues

6. Thermostat Set Too Low or Malfunctioning: If the thermostat is too low or not working, the water heater won’t know how much heat is needed. Check the settings.

7. Broken Heating Element (Electric): A broken heating element means the unit can’t create heat. If it isn’t working, it should be replaced.

8. Faulty Gas Control Valve: A non-functional gas control valve means the unit won’t have enough fuel to heat the water. Check and replace the valve if necessary.

Tank Problems & Physical Damage

9. Sediment Buildup: Too much sediment inside the unit will stop it from working properly. A system flush should do the trick.

10. Leaking Tank or Pipes: If there’s a leak, there won’t be enough gas inside the tank to heat the water. Check outside the tank and pipe for water buildup.

11. Broken Dip Tube: A dip tube carries cold water from the top of the unit to the bottom, where it’s heated. A broken line won’t move enough water and may need to be replaced.

12. Water Heater Age or Capacity Issues: If the heater is too old or can’t store enough water, it may be time for a new unit. Check the unit for a date or a serial number to determine its age.

Special Scenarios You Might Overlook

For tankless units, check the filter for clogs, monitor the flow rate, check for scale buildup inside the unit, and see if the winter freeze lock is on. Check for frozen pipes or exposed plumbing lines. You might also have too many appliances running simultaneously.

Troubleshooting Steps by Water Heater Type

plumber fixing a water heater thats not producing hot water For Electric Water Heaters:

-Check breaker box

-Test/reset high-limit switch

-Test heating elements

-Replace thermostat

For Gas Units:

-Inspect and relight the pilot light

-Check for gas smell

-Inspect thermocouples

-Adjust the thermostat

For Tankless Models:

-Flush system (scale buildup)

-Check for maintenance or error codes

-Confirm adequate flow and gas pressure

When You Should Call a Professional

You should call a professional if you’ve checked everything on the list above, if there’s leaking or rust around the unit, you smell burnt electrical wiring or gas, if your unit is older, or if you’re uncomfortable doing the work yourself. Self-repairs are cheaper, but can be dangerous.

How to Prevent Hot Water Loss in the Future

Proper maintenance is essential. Insulate your pipes, especially in a cold climate. Check your thermostat seasonally to ensure it’s working properly and do a yearly flush to remove any sediment buildup. You should also consider a routine inspection by a licensed plumber. Maybe switch to a tankless unit or get a new heater that’s correctly sized.

FAQs

Q: Why is my hot water not working, but cold water is fine?

Hot water requires the heater to work properly (i.e., make the water hot), while cold water simply passes through the pipes into your home.

Q: How do I know if my water heater is broken?

Common signs include water that won’t heat after several minutes, the water heater makes weird sounds, water buildup around the base, and strangely-colored water.

Q: Should I repair or replace my water heater?

It depends on factors like the age of the unit, how bad the issue is, and repair costs. If the above troubleshooting measures don’t work, you can ask the repair crew when they come to fix it.

Q: What is the average life of a water heater?

Different styles of water heaters have different lifespans. A gas or electric unit with a tank lasts between 8 and 12 years, while a tankless unit could continue to work properly for 20 to 25 years.

Q: Can cold weather stop my water heater from working?

Yes, cold weather can affect water heaters. If the water pipe freezes, the unit won’t get enough water to heat.

Get Your Water Hot Again with Benjamin Franklin Plumbing in Gainesville, FL

Benjamin Franklin Plumbing Tampa LogoThe most common reasons for a home not having hot water usually involve the water not being heated properly, usually because of a fuel or mechanical issue. You can use this list to help you troubleshoot if you feel comfortable, but it’s always a good idea to call the professionals.

For Gainesville, Florida-area water heater repairs or installations, schedule an appointment with Benjamin Franklin, The Punctual Plumber. Instead of waiting for a company that will fix it “when they get around to it,” we’ll get the job done right the first time and on time, guaranteed!

Filed Under: Blog

How to Handle a Leaking Water Heater (Step-by-Step Guide)

leaking water heaterA leaking water heater is the last thing you want to deal with after a long day at work. If you see water on the floor, don’t stress or fret. It’s easy to feel overwhelmed by the situation, but having a plan in place will make handling the issue easier and prevent further damage.

This article will walk you through the steps to take when your water heater leaks. We’ll cover how to secure your home, diagnose the leak, decide whether to repair or replace, and how to prevent leaks in the future.

Key Takeways:

  • Act quickly to clean up the water and secure your home.
  • Diagnose the source of the leak to ensure a long-term fix.
  • Know when to repair or replace your water heater.
  • Fixing the leak will prevent further damage.
  • Regular maintenance helps prevent leaks.
  • Calling a professional will guarantee you follow the best course of action.

Act Fast: Secure Your Home (Before You Investigate)

Acting quickly is paramount to minimizing damage when dealing with a water heater leak. Before you start investigating the cause, you first need to protect your home.

Turn Off Power

The process for turning off the power to the water heater depends on the unit’s fuel source. If it’s electric, go to the breaker box and turn off the dedicated heater circuit. For gas models, twist the gas valve to OFF.

Refer to the unit’s handbook or get an expert’s assistance if you need help finding the gas valve or breaker.

Shut Off Water to the Heater

Find the valve that turns off the cold water supply; it’s often on top of the water heater. To turn off the water supply, turn it clockwise. Try turning the valve with pliers or a pipe wrench if it’s stuck or difficult to turn; just be careful not to apply too much pressure.

Protect Your Property

When dealing with a leak, you must protect your home’s floors and walls from further damage. You can do this by using towels, buckets or a wet vac to remove any standing water. If you have a drip pan available, place it under the heater to catch water. The longer water stands, the higher the risk of mold and mildew growth.

Pinpoint the Leak: Where Exactly Is the Water Coming From?

Once you secure your home, it’s time to find out where the leak is coming from. Let’s look at the most common places for leaks to occur.

Top of the Water Heater

The top of the water heater likely has inlet and outlet pipes. When these pipes have corrosion, rust or loose fittings, they can leak.

T&P Relief Valve

The T&P valve is responsible for releasing excess pressure inside the tank. Even though this part might leak a bit of water when it releases pressure, it shouldn’t leak constantly. If it does, you might need to replace it.

Drain Valve (Near the Bottom)

As sediment builds up inside the water heater, the drain valve near the bottom may leak. This is a common leak source because the sediment can wear down the valve seal or prevent it from closing.

Internal Tank Leak

Water pooling beneath the water heater is a major red flag for an internal tank leak. This often results from a weakened lining or internal corrosion.

Condensation (Not a Leak!)

It’s quite normal for condensation to build up on the outside of the tank, especially in humid conditions. If you only notice water dripping from the tank when it’s really humid, it’s likely condensation and not a leak.

What the Leak Tells You: Repair or Replace?

residential water heater
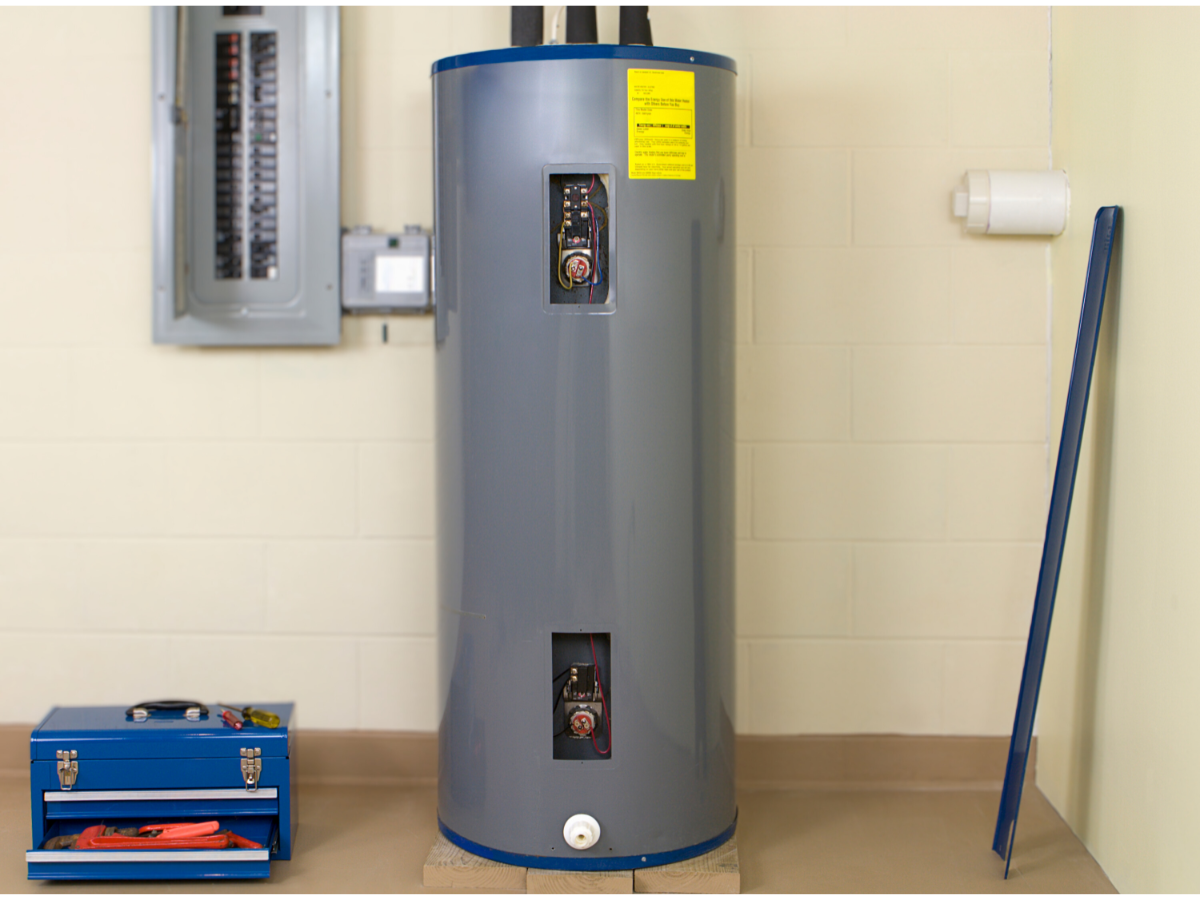
Now that you know where the leak is coming from, you must decide whether to repair or replace the water heater. Here are some helpful tips you can use to make the best choice.

Repairable Issues

Many types of leaks are quite easy to fix. For example, leaks caused by loose fittings, a stuck valve or a cracked drain valve cap are all repairable. This means you won’t have to replace the whole unit.

– Average repair cost: $100-$250 (depending on the issue)

– DIY difficulty: Low to moderate (depending on your experience)

Unrepairable or Not Worth Repairing

If the tank itself is the source of the leak, it’s usually best to do a full replacement. Older units (over 10 years) and those with severe corrosion also typically warrant replacement rather than repair.

Bonus: How to Check the Age of Your Water Heater

You can find the model year of your water heater by analyzing the label’s serial number. The process of deciphering the serial number varies among brands. Using specialized resources on the websites of well-known manufacturers like Rheem, A.O. Smith and Bradford White will make the decoding process easier.

How to Fix Each Type of Leak (If You’re a DIYer)

If you’re a DIYer, here’s a step-by-step guide on how to fix the most common types of leaks.

How to Tighten Loose Fittings Safely

Turn the connection with a wrench until it’s snug to tighten a loose fitting. To avoid causing any damage, be cautious not to overtighten.

Replacing a Faulty T&P Valve

First, turn off the water supply and empty the tank. Then, take out the old valve. Get a replacement valve that fits your model and seal it tightly to prevent any leaks.

Fixing a Leaky Drain Valve

Drain the tank and take out the old valve to replace it in its entirety. Put on a fresh brass cap or valve and make sure it’s tight.

Dealing with a Failing Tank

To empty the tank, connect a hose to the drain valve and point the water’s flow in the direction of an appropriate drainage spot. Once the water drains, turn off the water and electricity to the old unit and take it outside for proper disposal.

If you need a new water heater, consider the following shopping tips:

– Gas vs. Electric: If your home already has a natural gas line, a gas water heater may be more cost-effective long-term. If not, stick with anelectric version.

– Tank vs. Tankless: Opt for a tankless model if you want to save energy or have limited space.

Prevent This From Happening Again

Prevention is key to extending the life of your water heater.

Flush Your Tank Yearly

Flushing the tank yearly will minimize sediment buildup and help the unit operate more efficiently.

Quick 5-step guide for flushing the water heater:

1. Turn off power or gas to heater.

2. Shut cold water supply valve.

3. Attach hose to drain valve.

4. Open valve and flush until water runs clear.

5. Close valve, refill tank, and restore power.

Inspect the Anode Rod

The anode rod has the job of preventing tank corrosion. You should inspect it every one to two years. Look for rust, corrosion and significant wear. If you notice any, go ahead and replace the rod.

Install a Leak Detector or Smart Shut-Off Valve

Prevent expensive water damage by installing a smart shut-off valve or leak detector. You’ll receive an alert as soon as the device notices a leak. Some versions can even automatically turn off the water supply.

When to Call a Professional (And What to Expect)

A DIY approach is not safe for fixing a leaky water heater when cracks appear in the tank or water leaks uncontrollably. In these situations, you’ll need professional help.

When vetting a plumber, make sure to check out their license and insurance status. Reading through reviews will give you a clear view of the company’s response time and customer satisfaction levels. Ideally, you’ll want to hire a plumber that provides emergency services since water heater leaks can happen at the most inconvenient times.

Fixing Water Heater Leaks With Benjamin Franklin Plumbing in Gainesville, FL

Benjamin Plumbing is a go-to service provider of water heater repairs and replacements in Gainesville and surrounding areas. We work on water heaters of all types, including tankless models. We’ll quickly find out what’s wrong—whether it’s a leak or no hot water—and make the necessary repairs.  Our calm, informed approach can save you thousands of dollars.

FAQ

Here are some answers to frequently asked questions about water heater leaks.

Why is my water heater leaking from the bottom?

When a water heater leaks from the bottom, it’s usually due to internal corrosion. A full replacement is typically the best action in this scenario.

Can I use my water heater if it’s leaking?

Using a water heater that leaks can cause water damage and worsen the problem. Turning it off and calling a plumber will prevent further issues.

What causes a water heater to leak?

The most common reasons that water heaters leak are corrosion, loose fittings and faulty T&P valves. Regular maintenance is key to preventing these problems.

Filed Under: Blog

  • « Previous Page
  • 1
  • 2
  • 3
  • 4
  • 5
  • Next Page »

How can we help you?

Your Name(Required)

Our Location

Benjamin Franklin Plumbing
5111 NW 13th St Suite C,
Gainesville, FL 32609

Phone: (352) 781-0536

Hours of Operation:

Monday: 24 Hours
Tuesday: 24 Hours
Wednesday: 24 Hours
Thursday: 24 Hours
Friday: 24 Hours
Saturday: 24 Hours
Sunday: 24 Hours

Connect with Us

Facebook Youtube

Our Services

Drain Clearing
Drain Unclogging
Drain Cleaning
Emergency Plumbing
Faucet Installation
Faucet Repair
Garbage Disposals
Garbage Disposal Repair
House Repiping
Hydro-Jetting
Leak Detection
Plumbing Repairs
Sewer Line Repair
Sewer Line Replacement
Shower Installation
Shower Repair
Sump Pumps
Tankless Water Heaters
Toilet Installation
Toilet Repair
Water Filtration
Water Heater Installation
Water Heater Repair
Water Line Repair
Water Line Replacement
Water Softeners
Well Pump Repair

About

Our Company
Contact Us

Copyright © 2026 · Service Minds

Book Online
(352) 781-0536